Showing posts with label Black. Show all posts

Saturday, April 6, 2013

OPI Mariah Carey Liquid Sand Mini Pack

Few days ago I got a cute package from a Slovenian online store. They surprised me with a mini pack of OPI Mariah Carey's liquid sand collection. I'm seeing this trend everywhere at the moment and I couldn't wait to test them out. Since I got a mini pack and didn't want to just swatch them, I decided to go with skittles. :P I added 2 coats of each and I was surprised with a gritty effect but I just love it! :L It truly looks like a sand on your nails, perfect! Which one is your fave?

V sredo me je v dobro voljo spravil paketek iz spletne trgovine Za Piko na i. :i Dobila sem priložnost preizkusiti mini set OPI lakov iz kolekcije Mariah Carey. V paketu je bil tudi OPI koledar, ki sem se ga res razveselila in že krasi  mojo sobo. :L 


Liquid sand tekstura je nekaj novega pri OPI-ju in seveda vseh drugih znamkah, ki sledijo tem trendu. V kolekciji Mariah Carey so štirje taki odtenki. Ker nimam 10 rok, kjer bi lahko preizkusila vse lake naenkrat, sem se odločila za skittlse in tako ubila 4 muhe na en mah. :P

Stay the Night - The impossible - Can't let go - Get your number

Posušijo se v strukturiran mat finiš, kar jih naredi posebne - kot pesek na nohtih. :L


Z nanosom nisem imela nobenih težav. Po prvem sloju so sicer malo bolj prozorni ampak z debelejšim drugim slojem sem dosegla popolno prekrivnost. Izognila sem se nadlaku, ker bi potem izničila ta mat efekt, ampak tudi to bom morala poskusiti v naslednjih dneh. :L Naj omenim še, da so v živo še lepši, saj mi nikakor ni uspelo ujeti bleščečih drobcev, ki so v živo zelo opazni. :$


Hecno - včasih me je ta grobi občutek pri nekaterih glitter lakih zelo motil, zato sem vedno dodala najmanj 2 sloja nadlaka. :D  Ampak po pliš nohtih, ki jih obožujem, sem vzljubila tudi ta efekt. :$

Več OPI lakov, ki jih lahko kupite na Za piko na i, lahko najdete tukaj.

Kateri je vaš najljubši?

P. S.: Huh, napisati objavo v slovenščini je bilo težje kot sem pričakovala. :$ 

Thanks for reading!

Xoxo,
Ivana :k

*Products in this post were sent to me by Za piko na i! For more information read my disclosure policy!

Saturday, September 15, 2012

Video Tutorial: How I stamp my nails

I got a request to make a video tutorial about stamping. First I didn't know if I should really make one, because I can stamp my nails really bad sometimes, especially with some difficult patterns. But then I decided to film myself doing an easy zebra pattern. I love animal prints, because they're easy to stamps and mistakes are barely visible, so double win. :i

My hands look so bad on these pictures I took.  Manicure was so bright in person, because I decided to use Beach Cruiser from Orly. I'm in love with this polish, just like with Fancy Fuchsia. :L


Enjoy. :P


I put these infos in an info box on YouTube, but just in case you don't watch this video on YouTube and can't see the info bar.

Stamper ~ there's a few different versions of stampers like this one I'm using in this video or double sided. If your stamper doesn't pick the color well, try to file it a bit to make it a bit rough.

Scraper ~ I'm using my old plastic card as a stamper, because it works great and it doesn't scratch my plates like metal scraper I have. I would suggest a plastic scraper over metal, but even old credit card works just fine.

Stamping polish ~ I'm using stamping polish but sometimes you don't need them, because regular polish can work with stamping too... Especially metallics and one coaters, holos,... You need to experiment to see if they work or not.

Double stamping ~ I always have to double stamp my thumbs and other nails if they're long as in this video. Some patterns are really easy to line up and get a perfect stamp, like this zebra print I'm using in this video.

Top coat ~ Some top coats don't work great with stamping, because they smear the pattern. If you have those problems, be sure you gave a enough top coat on the brush. If the top coat still smudges the pattern, try another top coat.

Essence Nail Art - Protecting Base Coat
Orly - Beach Cruiser / 2 coats
Stamping: BPS black stamping polish & BM-223
Essence - High Shine Top coat

What do you think? :) I hope someone will find this video helpful. I'm not really super great with stamping, but I'm learning. :D

Thanks for reading! Have a lovely weekend!

Xoxo,
Ivana:k

Wednesday, August 8, 2012

Inspired by: Leopard Print by Chalkboard Nails

This time I was inspired by a fellow blogger Sarah at Chalkboard Nails, who definitely is one very talented lady. :h Her blog is just amazing and full of inspiration! I needed a quick manicure so I went with an easy Leopard print tutorial.

I'm not really a fan of freehand nail art, because I want everything to be perfect, so when I was done, I wasn't really liking it at first. :i
Essence Nail Art - Protecting Base Coat
CH Nail - #14 / 2 coats
Leopard Print: Dotting tool + China Glaze - Snow & BPS  black stamping polish 
Beauty Secrets TC Fast Finish Polish Dryer
 
Daylight
Here you can read Sarah's post. I added her tutorial below if you haven't seen it already:


Very simple version of Leopard print if you prefer freehand nail art, all you need is a dotting tool and 3 colors of your choice. :D

Let me know what do you think! Thanks for reading! :h

Xoxo,
Ivana :k

Friday, July 13, 2012

Pink Glittery Leopard Print

My nails are in bad condition atm, so I'm not really into making something special, mostly I'm wearing just bright and neon pinks. :i That's why I'm not posting really often. Week ago I got another parcel with goodies for review purposes from Born Pretty Store and I decided to bring my nails to life. :D

Final result...
Daylight
I got BK Nail Polish in #8850 (that's the number from the bottle, on BPS page you can find it here under #08). It's pretty bubblegum pink with not really matte but more like satin finish. Brush is wide and flat, formula is superb and it dries fast.
Daylight
Essence Nail Art - Protecting Base Coat
BK Nail Polish - #8850 / 2 coats

Then I decided to use my new goodies I got from Canadian Nail Fanatic that I won in her giveaway - Cheeky Plates and China Glaze - Full Spectrum. <3 I also tested BPS Black Nail Art Stamping Polish. You get 3 ml of thick black polish, which works great with stamping. I think once you pick the pattern with stamper, you have to work fast or it can dry before you manage to transfer the pattern on the nail. Or maybe it's just me out of practice, because I lately rarely stamp my manicures. :i

Essence Nail Art - Protecting Base Coat
BK Nail Polish - #8850 / 2 coats
Stamping: BPS Black Nail Art Stamping Polish  + Cheeky CH2
Dots:  China Glaze - Full Spectrum
Ring finger
BK Nail Polish - #8850 / 2 coats
China Glaze - Full Spectrum / 2 coats
Beauty Secrets TC Fast Finish Polish Dryer


What do you think? Are you already tired of animal prints here on my blog? :i

Don't forget to use code J10X31 to get 10% off on your order. ;)

Thanks for reading and have a lovely weekend! :h

Xoxo,
Ivana :k

*Some of the products in this post were sent to me by Born Pretty Store! For more information read my disclosure policy!

Thursday, June 7, 2012

Neon Pink Houndstooth Nails

Let's continue with the goodies I got from Born Pretty Store. I already told you I'm into neons lately and I really need more of them in my life. So when they offered me to try some things from their store, I immediately knew what I want to try out this time. :D

CH Nail #14 is a part of their neon collection. I picked this one, because I wanted something bright and pink. ^_^ I didn't know what to expect but when I tried it, I fell in love with. It's highlighter neon pink. <3 I really like its brush, because it's more on a flatter side, which makes application even easier. Formula is great, you can easily get away with 2 coats. I didn't use a top coat on the picture below, so you can see it has some kind of this plastic finish.

Essence Nail Art - Protecting Base Coat
CH Nail - #14 / 2 coats

I'm really happy with this polish and I'll be definitely wearing this one through the whole summer. I have no idea if these are B3F, because the ingredients aren't listed on the bottle, but this one doesn't stink like polishes with Formaldehyde, DBP & Toluene. It's $4.99 per bottle and the bottle contains 15 ml (with a cuopon code you get a nice deal :i ).

And because I also got this Double Sided Stamper I had to try it out too. I tried this pink houndstooth dress in H&M months ago, which I really loved, but it looked horrible on me so I didn't get it. :D But I really loved that black & pink combination, so I decided to recreate it with this neon pink. :D

Essence Nail Art - Protecting Base Coat
CH Nail - #14 / 2 coats
Stamping: Wet n Wild - Black Créme & Konad m63
Beauty Secrets TC Fast Finish Polish Dryer

And I'm still wearing this manicure, because I love it so much! :L What do you think?

So I tried this double sided stamper for the first time and so far I'm loving it! It's much easier to hold it in hands and transfer the pattern from the plate to my nails. I also got the regular stamper from BPS and they're same size, the only difference is that the double stamper is smoother but it still picks the pattern perfectly as the normal one. Double stamper has a green smaller stamper for smaller patterns but I don't know if I'm ever going to use that one, because I'm really not a fan of smaller patterns. :D It comes with a metal scraper and I prefer credit cards more than metal scrapers, because they easily scratch my plates.


Don't forget to use code J10X31 to get 10% off on your order. ;)

Let me know if you already tried any of these! Do you like Houndstooth nails?

Xoxo,
Ivana :k

*Some of the products in this post were sent to me by Born Pretty Store! For more information read my disclosure policy!

Thursday, April 12, 2012

Step by Step: Pink Leopard Manicure

I'm so in animal prints lately, can you tell? :D So here's another one... But unfortunately I love this manicure in person more as on this pictures. Some of them I took 3 days ago when the weather was so grey and rainy so they aren't the best. And everything looks so better in person. :(

Anyway another step by step, easy as always but I took some pictures in between and I want to post them all together. Another layering and stamping... Here's the final result. :)

But it's much prettier in person, because that holographic glitter doesn't show up at all. :( More after a click.:)

Saturday, April 7, 2012

Step by Step: Gold Glittery Zebra Print

I'm seeing Easter nails everywhere but I must say I'm not in Easter mood at all, probably because I still can't believe it's already April. :/ Well, I ate already tons of chocolate eggs. :$ I hope I'll make an Easter mani till next week, when we're celebrating an Orthodox Easter. :) 

My nails really make me sad for months now and I can't find a reason why are they peeling so much, so of course I filed them down to nubs again. I have some peelies down to the nail bed so they need to grow out but even when they grow out, they start peeling on the same place. Annoying! :)

Oh well, when I'm having nubs, I tend to use something really neutral or when I'm in the mood, I do something crazy and fun and make them at least prettier with a design. :D So, I had this lovely combination in my minds and it turned out just perfectly.... Just like the title says: Gold Glittery Zebra Print. <3


They look so good on picture. :D It looks like I spent hours on doing them, but I was done so fast - just a fun layering and stamping and you get nails like this. :) It's very similar to the first Purple Sparkly Zebra Print I did months ago. :) I took pictures of all steps so I'm posting them here as a Step by Step "tutorial", but this is far from a tutorial, because it's really really easy. :D But in case someone who doesn't have an idea how to achieve nails like this, I posted all pictures, so more after a click. 

Monday, January 23, 2012

Leopard Print

Time flies by just too fast. :/ I don't have a lot of time for nails but I finally took some time to remove my previous manicure and make something quick but cute. :) I'm in a brown period lately so I wanted to have something brown on my nails too and what's better than leopard print? :) 

I started with one coat of BS and Essence - Zulu (light gray creme with plastic finish) just to give my nails a color. I decided to sponge Desert Fox (greyish brown), also from Essence, and Warm & Fozzie (brown copperish duochrome) from OPI to get a little shimmery look. :) I stamped leopard pattern with BPS M57, as I already told you that the patterns are small so I had to double or triple, but I didn't have problems with placing the pattern to look like I didn't have to stamp twice. :) I added some dots with 2030 from China Glaze - gold metallic color and a layer of TC to finish my whole manicure. 
When I made it yesterday I wasn't sure if I like but as soon as I saw it on sun, I love it! :)

Sun
Daylight
Nail Tek - Foundation 2
Essence - Zulu (TE Into the Wild) / 1 coat
Essence - Desert Fox (TE Into the Wild) / sponged
OPI - Warm & Fozzie / sponged
Wet n Wild - Black Créme & BPS M57 / stamping
China Glaze - 2030 / dots
Beauty Secrets TC Fast Finish Polish Dryer

What do you think? I will probably wear it for whole this week. &lt;3 Do you like wearing animal prints? Which one is your favorite? Mine are probably leopard and zebra. :)

Thanks for reading and have a lovely day! :rainbow

Xoxo,
Ivana :k

Sunday, January 15, 2012

Stargazer - 307 & Born Pretty Nail Art Stamping Plate m57

Weeks ago I got another package from Born Pretty Store with few products for review purposes and here is the first I decided to try out. These pictures are quite old now but I never had time or will to crop and prepare them for post. Better late than never, right? :)

I got another image plate in mail - m57. I wanted it for a while, because I still don't own it. I just overlooked the important text on their page saying that the patterns are smaller than others. It'd be probably perfect for those with short nails but for me some patterns are too small, even normal patterns are sometimes too small for my nails but you can still use them of course. :)

Here you can see m57 on the right and m69 also from BPS on the left. You can see that the patterns are smaller on m57.


I wanted to try out another Leopard French Manicure I did before with different base color so I used Stargazer - 307 for my base. I'll show you pictures of this polish on its own in one of my next posts. :)

I used tape for diagonal lines and stamp my tips with this leopard pattern and Wet n Wild - Black Créme. On my middle finger I had to stamp the pattern twice to cover my whole nail. I probably couldn't do that with fishnet pattern, it'd be hard to make it look like I didn't stamp twice so if you have long nails or nailbeds, that pattern will be too small for you. :)


Nail Tek - Foundation 2
Stargazer - # 307 / 3 coats
Wet n Wild - Black Créme & m57 / stamping
Beauty Secrets TC Fast Finish Polish Dryer

I hope you can see the pattern but it was really hard to take pictures of this mani. :/ What do you think? Do you like it?

Born Pretty Store has so many stamping plates and lots of other nail supplies for nail art with free worldwide shipping so I'd recommend you to take a look. You can also use code IRJ61 for 10% off on your order. ;)

Do you have any image plates from BPS? Do you like them? Thanks for reading! :)

Xoxo,
Ivana :k

*The product in this post was sent to me by Born Pretty Store! For more information read my disclosure policy!

Tuesday, January 3, 2012

Holiday Guest Post #9 & Swap: Polish Amor ♥

Yay, first post in 2012. :e

We're having Iris from Polish Amor ♥ here. &lt;3 I found her when Iris contacted me for swap so we started talking through e-mails and I always love to check her posts, especially when she's showing us her son D. &lt;3 This post will probably be so long but let's see what she has prepared for us first. :e


Hello Ivana readers :)
First of all I want to say thank you Ivana for including me in your Holiday Guest Post Series, I was thrilled when I received your email and I am super excited to be posting here today! I love your blog, your PINK manis are the BEST!!!
I had originally planned on coming with some kind of pink in my mani, but things didn't go as planned :( So today I will show you a New Years Eve mani, this was quite simple. I love sponging, you can never go wrong with that, so thats what we have here. Enjoy!


This is 2 coats of Color Club Gingerbread Man, sponged with Wet n Wild Black Cream and that special little sparkle is Essense Blair, which I got in a swap with Sweet Ivana :)
Ivana, thanks for having me here today! Hope your hand is completely better now :) Can't wait to see new manis.

Happy New Year!!!
XoxO to you and Bebo


First I thought you add black glitter then I read you sponged the black. It's so sparkly! I love it! &lt;3 It's so special, I think I didn't see anything similar till now. Thanks for making a post for me Iris, means a lot. :)

What do you think about her lovely manicure? In case you don't know her blog, check Polish Amor ♥ and show some love, she deserves it! I love her twinsies post with Maria from Nails Made Simple, so cool! :e

Me and Iris did a swap recently so I just have to share all the goodies I got from her. She spoiled me too much! &lt;3 If you want to see all goodies I got from her, click read more. :)

Monday, December 12, 2011

Step by Step: Pink & Black Half Moon Manicure

I always wanted to try half moon manicure but I never made it perfect to show you the final result. I thought that I could make it free hand just like ruffians I tried before but I'm not that good at it at all. xD

I made almost perfect half moons with reinforcement rings, I just wish my nails were longer for this look. Next time I'll try to make half moons smaller. :) You can use reinforcement rings, you can try to freehand it or use a small nail art brush... As you wish. :)

I used a lovely purple holographic Catherine Arley with number 677, which I got in a swap recently from lovely Nina from Women's Temptations and classic black creme. :) I'll show you swatches of the holographic one next time, first I wanted to share my first half moon try and a quick tutorial. :P

All pictures below were taken under daylight bulb and black background. 


Catherine Arley - #677 / 2 coats
Beauty Secrets TC Fast Finish Polish Dryer

I decided to make a step by step tutorial with smaller half moons as I did them on the pictures above. :)

All you need is a base and top color, reinforcment rings and top coat. I used these polishes:

Catherine Arley - #677
Reinforcement rings
Beauty Secrets TC Fast Finish Polish Dryer


Step 1: Start with a base color you want. It can be bright or dark, anything you like. I suggest that you try to do a half moon manicure on a day or more old manicure, because you don't have to wait base color to dry. That's how you can also hide a tip wear or any chips that happen in days and get new manicure with an upgrade.
Step 2: Place reinforcement ring where you want your half moon to be when the base color is 100% dry. If you want smaller half moons, place it more towards cuticle and reverse. I always use just half of the ring, because I can have 1 ring for 2 nails. Just make sure you rub the ring a little hard, to make sure that ring is completely down.
Step 3: Add a layer of top color all over your nail and a little over reinforcement ring to make a half moon line. 
Step 4: Remove the reinforcement ring right after you apply your second color when it's still wet. You can make some tiny correction with the brush after you remove it if the line isn't perfect but if you're satisfied with the half moon, finish the whole manicure with a layer of top coat and you're done.

I'm not the first one who made this manicure like this but I still wanted to do a tutorial if you didn't know about it. :) What do you think about Half Moon manicures? What's your favorite color combination? How do you make your half moons look perfect? :)

I just broke my daylight bulb and I almost throw down my lap top. Thankfully my lappie is in one piece but I need to get another daylight bulb soon. :) I'm also seeing the anesthesiologist in the morning so he can tell me when I'm having a tiny surgery on my wrist to remove ganglyon cyst. I have a big lump on my wrist now and it started hurting me when I'm using my right hand so I had to do something. Wish me luck! But a great news is that I won a giveaway at Cristina's blog Pee Before Polish (awesome name 8) and it's so true!).Thank you Cristina for making my week! :h

Thank you for reading and stopping by! I hope I'll be back to blogging soon. :)

Xoxo,
Ivana :k

Sunday, November 20, 2011

Step by Step: Sparkly Purple Zebra Print

I don't have time for doing my nails so often as before but I still want my nails to be pretty. I usually pick a color I like and wear it for a week without a chip, but because my nails are so short, I decided to make something else. :)

I shorten my nails 2 days ago, because I had some major breaks lately and if you read my blog for a while, you know I hate when my nails aren't all square or same lenght. So, it was time for a fresh start. I have a birthday next month so I decided to slowly grow them out till then. :)

Here's what I came up with. :) All pictures in this post were taken under daylight bulb with black background. 


If you want to see step by step pictures (a.k.a tiny picture spam), click read more. :)

Tuesday, July 5, 2011

Essence You Belong To Me & Crack me! Black

Although I liked this color I decided to try how Essence Crack me! Black looks over You Belong To Me. I'm actually so bored with all crackles, because almost every brand has some. I want something new, not just crackles in one million different colors. :i
I got both to try out and here is Crack me! Black. Like almost all crackles, you must apply a coat over any dry polish. I tried China Glaze's crackles and their application is quite thick and this one isn't thick at all. It's so smooth, you can apply it so easily. Great job, Essence! 
It dries fast and it's very pigmented. Patterns of crackles are different than China Glaze's so it just depends, what you like more. I really love China Glaze's crackles but love Essence's formula. :P

It's dries matte so if you prefer shiny version, you can always apply a TC. :)


Sun
Daylight
With a layer of TC...
Sun
Daylight
What do you think? Do you like these kind of crackles or do you prefer China Glaze, OPI, Nicole by OPI, Barry M, LCN, Models Own, Golden Rose, etc. etc. etc... :D

A tiny picture spam, but I just couldn't decide which one to show you. :) I'm actually writing this post for an hour, my head is crazy, it seems like I forgot all words in English. :D I also spilled out a bottle of 108 Degrees today... I was sooooooooo mad! xo Not because I ruined the carpet but because I spilled one of most  beautiful polish. There's still a lot left but still... I'm so clumsy sometimes. xo

Nighty night,
Ivana :k

Sunday, May 29, 2011

Black Extravagance Ruffian

Boooo, I can't sleep! And I don't have energy to study so here I'm writing a post - perfect timing. :) I watched halftime of Barca:ManU and then I did my workout Insanity tranining during the second halftime (btw these workouts are really insane but interesting - if you want to know more about, just let me know :))... When I's finished, I saw that Barca won! Yay! So confusing, I'm the biggest fan of Real Madrid but I'm happy that Barca won today, because I really don't like ManU. :D I'm sure Abby is having her best dreams today. :P

Anway, I'm sure I already told you that I LOVE Ruffian manicure. It's so pretty, elegant and definitely something new to everybody here. :) I got Wet n Wild - Black Crème in my latest swap with blondie711 from MUA (note to myself: Take pictures of goodies you got  from her asap!). I never wear black on my nails, black is way too dark for my nails though. But... When I saw how opaque it is, I realized that it would work great for ruffian. I had OPI - DS Extravagance on my nails since Saturday so I wanted something new... And here it is... My new try of ruffian mani. :)

Black Crème is a perfect black creme one coater. If you need a black creme nail polish, I'd strongly recommend this one, application is amazing. :)

The weather here is sooo horrible, it's so hot lately but yesterday was sooo cold. I really hate those temperature differences. So, I don't have any sunny pictures for you. Booo! I'm sure Extravagance would look stunning now. :) I hope it'll be sunny tommorow! :$

I just realized I posted 3 almost same pictures with different backgounds. :$ I guess my hand is always prepared in this pose for taking pictures. :i

 
Daylight

Because my phone isn't great for filming details, no video tutorial from me. :) But then I remembered that Nihrida (I'm sure you all know her, her stunning nails and her awesome blog :L ) filmed it a while ago, so I'm posting it here so you could take a look if you didn't saw it.


When I tried it for the first time after seeing this tutorial my manicure was a mess. Later I tried totally spontaneously with Wild at Heart I immediately fell in love with. I'm becoming even better with my right hand! :D

I would suggest that you add a layer of TC after applying your base color, because if you mess up something after applying a second color, you can still fix it with a brush soaked into nail polish remover. :) It's also way more easier if you pick very opaque polish, because you don't have to add 2 or more coats. :)

What do you think? Like it or not? Did you already try to make Ruffian? If so, what colors did you pick? Share some photos. :h

That's it for now from me, this weekend was all about my blog so I'm off to books from tommorow morning!

Xoxo,
Ivana :k

Sunday, April 17, 2011

Orly - Fancy Fuchsia + Konad #2

Quick post right before I'm going to bed. :) 

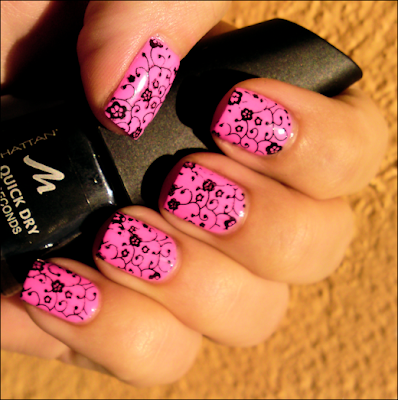
Like I said, I wasn't satisfied with my first konadicure that's why I carefully remove the previous stamping and add another... Zebra print. :i I used m57 and Manhattan 1010N again for stamping. :)

Daylight
Sun
It looks prettier on pictures than in RL that's why I already have a new manicure, which I'll probably show you in next days if I won't be tired to much to take photos. :) 

I wish you a great beggining of the week!

Nighty night,
Ivana :k

Orly - Fancy Fuchsia + Konad #1

I said I probably won't add anything to this beautiful Fancy Fuchsia but I did and now I regret it. :( I decided to stamp black over it but I didn't like the final result at all. That's why I removed the stamping and tried again but I still don't like it. I have to upload pictures of my current mani but here is my first try to make it even more prettier  - well I failed. :i
I used m73 and black Manhattan polish 1010N - after trying China Glaze's polishes from Romantique collection was stamping with this black just so difficult for me. xo And when I decide to leave it like it is my TC smudged the pattern that's why I's even more sad what I did to this beautiful shade. :D
Base color isn't color accurate, I just wanted to show you this manicure...

Sun
Daylight
Like I said a couple of time, I'm a big perfectionist and when I stamp my nails they should be perfect or I just don't like it... :D That's why I didn't like it, maybe is the lenght of my nails, the pattern or even color combination... I don't know. :)

Weekend'll be over soon and I'm so sad about it, I want to be at home for another week or 2, month, year... :P

Xoxo,
Ivana :k

Friday, March 11, 2011

Pink Leopard French Manicure

I just wake up, ate my breakfast and now I'm relaxing in front of computer like every day. Checking my mails, read the news, check all blog updates and now I'm wriing a new post. :) 
For this manicure I was inspire by Leslie from Nail Polish Art Addiction, who really make awesome free hand nail art. I'm not good at free hand nail art at all, so I used Konad image plate and try to make something similar like Leslie did. :)
My leopard mani has to be pink. :D For diagonal french tips I used scotch tape, so I easily stamped the pattern just on the tips. It was quite easy to do it. :)


Sun
Daylight
Base color: China Glaze - Rich & Famous
Stamping: Manhattan Quick Dry 1010N + M75 + filled with China Glaze - Admire

When I's taking pictures, I didn't pay attention to base color but on the pattern and my fingers. :D So, what do you think? If you'll try this mani, share a link. :)

I really like it and I'll definetely have this manicure for few days on my nails. :i

Xoxo,
Ivana :k

Wednesday, January 12, 2011

Ruffian that didn't survive the night

I'm a big fan of ruffian and I tried it now for a couple of times. When I saw Illamasqua Scorn polish on lots of blog the first idea was: "This one is perfect for ruffian!". The only - was its high price and I can't order anything online since I don't own any credit card. Then Essence released Black&White trend edition, which includes black and white polish with soft touch finish. I was 100% that I'll get white one but I wasn't sure if I'll buy also black one since I don't like black color on my nails. Swatches I've seen so far really convince me that I need black one too, so I bought it, it doesn't cost much. senyum

Black Out is very pigmented, one coater and also thick as hell! It has kind of plastic finish like Scorn. I wish I had China Glaze 2030 - gold khrome polish to make that famous ruffian, but since I don't own it yet, I pick pink one that I got recently from a friend. She was in Banja Luka (Bosnia) and she bring me one bright pink creme polish from Golden Rose with an amazing name - 24.ihikhik This polish is also very pigmented and one coater.

I had some problems with applying Black Out, because it's so thick but the final result was awesome. I took a picture under my desk lamp and flash. And I'm glad I did.ihikhik Pink is more bright than on first picture.

Under light
Flash

I did my nails aroung midnight yesterday and I fall asleep at 4AM I think. I thougt the manicure was already dry. I couldn't top it with TC, because I would lost that plastic finish of Black out. I don't know what happened during the night and how was I sleeping but when I woke up I saw ruined manicure.blur

Daylight


It didn't survive. tensionAt least I've a reason to change my manicure. I'll try to put thinner layer next time so I hope this won't happen ever again.

How do you like this combo? I really like it, but I would love to make it with gold under the black!!senyum

I've rached 250 followers! Wooooooohoooo, thank you, that really made my day!!peluk Now I'm going to study all night long. sedih

Xoxo,
Ivanacium